विशेष लेख
Log Pencil Holder: Simple & Stylish
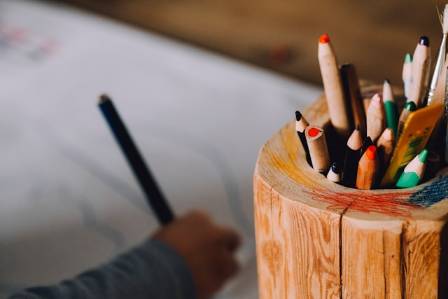
Keep your workspace organized while adding a touch of rustic charm with a homemade wooden pencil holder. With just a few simple steps, you can craft a unique alternative to traditional pencil cups without much effort. Follow this easy five-step guide to create your personalized desk accessory.
Isabella Hayes
लेखक
लेख परिचय
नीचे पूरा लेख पढ़ें।
अनुभाग
समाचार

Keep your workspace organized while adding a touch of rustic charm with a homemade wooden pencil holder. With just a few simple steps, you can craft a unique alternative to traditional pencil cups without much effort. Follow this easy five-step guide to create your personalized desk accessory.
Step-by-Step Guide
Step 1: Measure Your Log
First, determine the size you want your pencil holder to be.
You’ll Need:
Digital laser measure (like Zamo)
Tape adapter
Pencil
Start with a wooden log—birch works beautifully, but any sturdy wood will do. Decide on the height of your pencil holder; 8–12 cm is ideal. Use the tape adapter to position your laser measure from the edge of the log. Mark the cutting line with a pencil so you know exactly where to saw.
Step 2: Cut the Log
You’ll Need:
Cordless reciprocating saw with wood blades
G-clamps
Safety gloves and goggles
Secure the log with G-clamps on a stable surface. Put on protective gear, and carefully saw along your pencil mark. This will give you the base piece for your pencil holder.

Step 3: Sand the Top
You’ll Need:
Sanding block
Coarse sandpaper (80-grit works best)
Wrap the sandpaper around the block and smooth the top surface of the log. Sanding removes rough edges while keeping the log’s natural, rustic appearance intact.
Step 4: Drill Holes for Pens and Tools
You’ll Need:
Cordless drill
Brad point drill bits (8–10 mm)
Forstner bit (20 mm for larger holes)
Clamp the log securely again. Drill holes according to the size and number of items you want to store. Smaller holes are perfect for pencils and thin scissors; larger holes work for markers or other office tools.
Step 5: Add Your Personal Touch
You’ll Need:
Cordless glue gun
Glue sticks (any color)
Scrap wood or cardboard for practice
Pencil
Now it’s time to decorate! Use the hot glue pen to add patterns, textures, or designs to your pencil holder. You can sketch your design lightly with a pencil first. Once the glue has dried, your holder is ready to grace your desk. You could create anything from glittery zig-zags to simple geometric shapes—the choice is yours.
With just a few minutes and minimal effort, you’ve brought a piece of nature into your workspace. Congratulations on your handmade wooden pencil holder!
यह भी पढ़ें

दुनिया के सबसे आराध्य बच्चे जानवर
अर्जुन

हरे भरे स्थान, खुशहाल स्थान: भू-दृश्य और लॉन की देखभाल का कलात्मक मिश्रण
श्रेया

The Secrets Behind Why Wild Rodents Love Running On Wheels Just Like Your Pet Hamster
Carter Amelia

पारिवारिक सौहार्द बनाए रखने के लिए 5 सुझाव
राधिका

सिएटल साउथसाइड में शीर्ष 5 बाइकिंग ट्रेल्स
रिशभ

Stargazing in the Adirondack Mountains
Alexander Reid