विशेष लेख
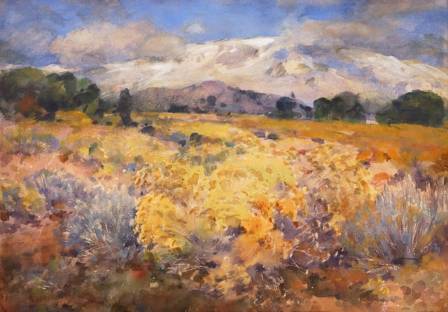
Step-by-Step Painting Tutorial Guide: Majestic Mountain Sunrise
Welcome to this detailed acrylic painting lesson, where we will create a beautiful landscape called “Majestic Mountain Sunrise.” In this project, you will learn how to paint towering mountain peaks illuminated by the golden light of dawn. Through a combination of color blending, layering, and texture techniques, you’ll transform a blank canvas into a breathtaking sunrise scene. Gather your supplies and get ready to begin this creative adventure.
Soren Wilde
लेखक
लेख परिचय
नीचे पूरा लेख पढ़ें।
अनुभाग
समाचार
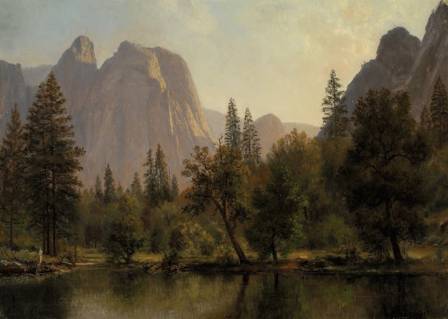
Welcome to this detailed acrylic painting lesson, where we will create a beautiful landscape called “Majestic Mountain Sunrise.” In this project, you will learn how to paint towering mountain peaks illuminated by the golden light of dawn. Through a combination of color blending, layering, and texture techniques, you’ll transform a blank canvas into a breathtaking sunrise scene. Gather your supplies and get ready to begin this creative adventure.
Materials Required
Acrylic Paint Colors
Titanium White
Cadmium Yellow Medium
Cadmium Red
Ultramarine Blue
Burnt Sienna
Payne’s Gray
Brushes
Flat Brush
Round Brush
Fan Brush
Detail Brush
Additional Tools
Palette Knife
Art Sponge
Canvas
Step 1: Prepare the Canvas
Before painting, make sure your canvas has been properly primed and is ready to accept paint. A smooth, prepared surface helps colors blend more effectively and ensures the artwork develops successfully.
Step 2: Paint the Morning Sky
On your palette, combine Ultramarine Blue, Cadmium Yellow Medium, and a small amount of Titanium White to create a soft blue-green tone. Using a flat brush, apply this mixture across the upper portion of the canvas with wide horizontal strokes. Blend the colors smoothly to establish the appearance of an early morning sky.
Step 3: Create the Sunrise
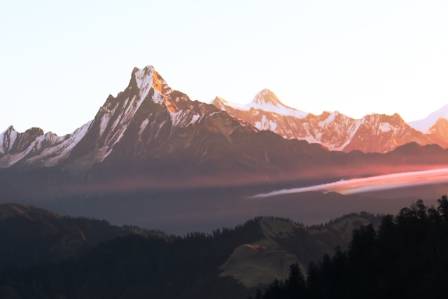
Mix Cadmium Yellow Medium and Cadmium Red to produce a warm golden-orange color. With a round brush, paint a circular sun near the horizon line. Soften the outer edges by blending gently so the sun appears to glow naturally across the sky.
Step 4: Paint the Distant Mountains
Create a pale gray-brown shade by mixing Titanium White, a touch of Ultramarine Blue, and Burnt Sienna. Use a flat brush to outline distant mountain ranges against the bright sky. Vary the shape and height of the peaks to create a natural and impressive mountain landscape.
Step 5: Add Mountain Shadows
Blend Payne’s Gray with a small amount of Ultramarine Blue to produce cool shadow tones. Apply these colors to the sides of the mountains opposite the sunlight. This step adds depth, dimension, and realism to the mountain forms.
Step 6: Build Texture on the Mountains
Using a palette knife, mix several shades of gray and brown. Apply these colors in controlled strokes to imitate rocky surfaces and rugged terrain. Alternate between scraping and dabbing techniques to create realistic mountain textures.
Step 7: Paint Foreground Features
Mix Burnt Sienna with Titanium White and use a combination of the flat brush and detail brush to paint foreground elements such as rocks, cliffs, or trees. Add highlights and darker areas to create volume and make these features stand out within the composition.
Step 8: Strengthen Highlights and Shadows
Apply Titanium White to the mountain ridges and peaks where sunlight strikes directly. These bright accents help emphasize the rugged contours of the landscape. Deepen the darker areas using Payne’s Gray mixed with Ultramarine Blue to increase contrast and create a more dramatic sunrise atmosphere.
Step 9: Blend the Horizon
To achieve a natural transition between the mountains and the sky, use a clean brush or an art sponge to softly blend the colors along the horizon line. Smooth the boundaries where the two elements meet, creating a balanced and harmonious effect.
Step 10: Refine the Scene
Take a moment to evaluate your painting from a distance. Add any extra details that will enrich the composition, such as distant trees, a winding stream, atmospheric mist, or subtle landscape features. These finishing elements can bring additional depth and interest to the artwork.
Step 11: Allow the Painting to Dry
Leave the painting undisturbed until it is completely dry. Allowing adequate drying time prevents unwanted smudging and preserves the quality of your work before making any further adjustments.
Step 12: Sign Your Artwork
Once you are satisfied with the finished painting, add your signature in a discreet corner. Signing your work gives it a personal touch and marks the completion of your creative process.
Step 13: Enjoy the Finished Piece
Step back and admire your completed “Majestic Mountain Sunrise.” Appreciate the vibrant colors, dramatic mountain forms, and peaceful atmosphere you have created. Let the beauty of the scene inspire future artistic projects.
Conclusion
Congratulations on completing this acrylic painting tutorial and creating your own stunning mountain sunrise landscape. Every color choice, texture, and brushstroke has contributed to the final result. We hope this project has inspired you to continue developing your painting skills and exploring new creative possibilities. Keep practicing, experiment with different landscapes, and most importantly, enjoy the journey of painting. Happy creating!