विशेष लेख
Master the Art of Wildlife Illustration: Painting a Majestic Stags in Oils
Capturing the essence of a serene forest scene involves more than just depicting an animal; it requires a deep understanding of how to merge a focal subject with a believable, atmospheric landscape. This project focuses on a stag standing alert in a quiet meadow, providing an excellent opportunity to practice depth, anatomical realism, and the integration of multiple visual references into a single, cohesive composition.
Julian Westbrook
लेखक
लेख परिचय
नीचे पूरा लेख पढ़ें।
अनुभाग
समाचार
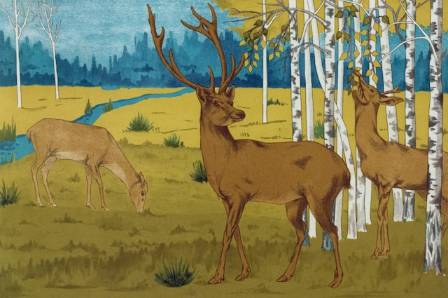
Capturing the essence of a serene forest scene involves more than just depicting an animal; it requires a deep understanding of how to merge a focal subject with a believable, atmospheric landscape. This project focuses on a stag standing alert in a quiet meadow, providing an excellent opportunity to practice depth, anatomical realism, and the integration of multiple visual references into a single, cohesive composition.
Throughout this process, you will explore techniques for creating soft, receding treelines that provide a sense of vastness. You will also learn to manipulate brush direction and tonal variation to render grass that fades naturally into the distance, ensuring the landscape feels as lifelike as the animal itself.
Preparation and Essential Materials
To begin, you will need a 16"x20" canvas and a specific palette of oil paints: Titanium White, Crimson, Cadmium Yellow, Yellow Ochre, French Ultramarine, Sap Green, Burnt Sienna, and Raw Umber. For the application, a set of bristle brushes is necessary for blocking in large areas, while a small soft filbert, a rigger brush, and fine liners are essential for intricate details like fur and antlers. You will also need a suitable painting medium to improve flow and control.
The first step is to transfer your stag template onto the canvas, ensuring you include directional lines that indicate the flow of the animal's muscle and fur. Use a masking film to cover the stag silhouette; this allows you to paint the background freely without worrying about overlapping the central figure.
Constructing the Atmospheric Background
Start with the most distant elements. Mix muted, soft colors for the furthest bushes to create a sense of atmospheric perspective. Begin with light, yellowish tones to establish the furthest foliage, leaving small gaps for darker shades. Gradually introduce darker mixes to add dimension, and use a blurring brush technique to keep these distant elements out of focus, which naturally draws the eye forward.
Repeat this process for the middle-ground greenery, using slightly darker and more saturated tones. Work from the lightest values to the darkest, dabbing on highlights and softening hard edges to maintain a shallow depth of field. For the meadow, apply light colors at the base of the treeline and transition into horizontal strokes toward the bottom of the canvas. Layer darker values between these lines and use specialized brush strokes to imply individual blades of grass without overcomplicating the texture. Once the background is complete, allow it to set before carefully removing the mask from the stag.
Rendering the Anatomy and Features
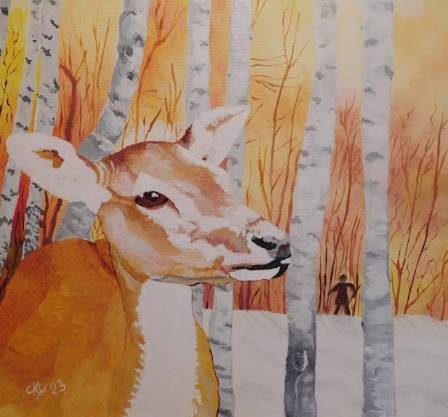
When painting the stag, it is best to work in sections, starting with the head. Begin with the lightest tones to block in the structure, then switch to smaller brushes for subtle tonal shifts. For the eyes, start from the dark center and work outward, adding a touch of reflected sky color to the nose and mouth for a realistic, moist appearance. Follow the directional lines of the head to ensure the fur looks natural.
The antlers require careful shading to appear rounded and three-dimensional. Mix a medium into your paint to help it flow, then apply highlights first, followed by mid-tones and deep shadows. Use a mottled, "dips and dashes" technique to replicate the textured surface of the bone. When moving to the neck and body, follow your pre-drawn directional lines strictly. This ensures the "hair" looks like it is growing over a muscular structure.
Final Details and Integration
For the legs and midsection, block in the lightest areas first to avoid contaminating them with darker pigments. Build up the tones to account for shadows and muscle definition. Instead of painting every individual hair, use varied brushwork to provide the impression of a coat. For the white areas under the tail, use a soft gray for shadowing to maintain a natural look rather than a stark, flat white.
The final touch involves adding foreground grasses over the bottom of the painting. Thin your paint and use a palette knife or a rigger brush to flick in dark, sharp blades of grass at varying angles. This adds a layer of depth that places the stag firmly within its environment. Once the canvas is fully covered, step back to evaluate the overall balance and make final adjustments to the highlights and contrast to ensure the stag stands out with quiet, elegant strength.

यह भी पढ़ें
दुनिया के सबसे अच्छे गांव कौन से हैं?
समीर
चार ऋतुएँ: प्रकृति के बदलते चक्रों की सुंदरता और आश्चर्य की सराहना
विनय
वर्न्मी झील का अकेला पेड़
उदय

Leveraging Seasonal Fruits for Optimal Anti-Inflammatory Defenses
Isaiah Ward
10 रंग विकल्प जो छोटे कमरों को बड़ा दिखाएंगे
कवि
Autumn Harvest Art Intensive: A Five-Day Workshop in Drawing and Painting
Daniel Carter Whitmore